With my new Proxmox box set up, I wanted to configure my own VPN so I could securely access my home network while away and also route my traffic through my home internet connection. This would let me benefit from my AdGuard setup, maintain a consistent “home” location, and have a fully private connection anywhere.
After some research, I landed on WireGuard, and then on Tailscale, which builds on WireGuard with automatic key management and device coordination. Even better, I learned that I could self‑host the control server using Headscale, giving me a completely independent, private VPN mesh.
Installing Headscale
Running the Install Script
The initial setup was straightforward thanks to the script available on community-scripts.org. I selected the root node, opened a shell and ran the “Headscale” script.
- Enable Diagnostics → No, Opt out
- Install type → Default
- Storage pool for container template → Local
- Storage pool for container → local-lvm
- Add headscale-admin ui → Yes
The script created the LXC container, downloaded the Debian template, installed Headscale and the admin UI, and confirmed network connectivity.

Once complete, it provided URLs for the API and admin interface. I opened the admin UI to confirm it was running, then created a DHCP reservation so the container would always get the same IP.
Editing the Config File
With the container running, the next step was configuring Headscale itself. The script places the config at:
/etc/headscale/config.yamlI opened a shell on the Headscale container, installed vim, and edited the file:
apt install vim
vim /etc/headscale/config.yaml
The only change I made was updating:
server_url: https://private.rirak.comThis will be the public entry point for my VPN.
DNS & Reverse Proxy Setup
With the server URL set, I needed DNS and SSL in place so clients could reach Headscale securely.
Creating DNS Records
In Cloudflare, I added an A record:
- Name: private
- Target: internal IP of the Headscale container
- Proxy: DNS only

Creating the Initial SSL Certificate (DNS Challenge)
I use Nginx Proxy Manager for reverse proxying and SSL certificates.
Because this was a new domain with no existing certificate, I used the DNS challenge for the initial issuance. The DNS challenge works even before the proxy is serving traffic, which makes it ideal for initial certificate creation. This required creating a Cloudflare API token with:
DNS → Edit
Zone → Read
Zone DNS Settings → Read
In Cloudflare, Manage Account → Account API Tokens → Create Token. Then create a token with these permissions:

Then click next to review and then create the token. Upon creation, the website gives us the key which will be used for auth in the next step.
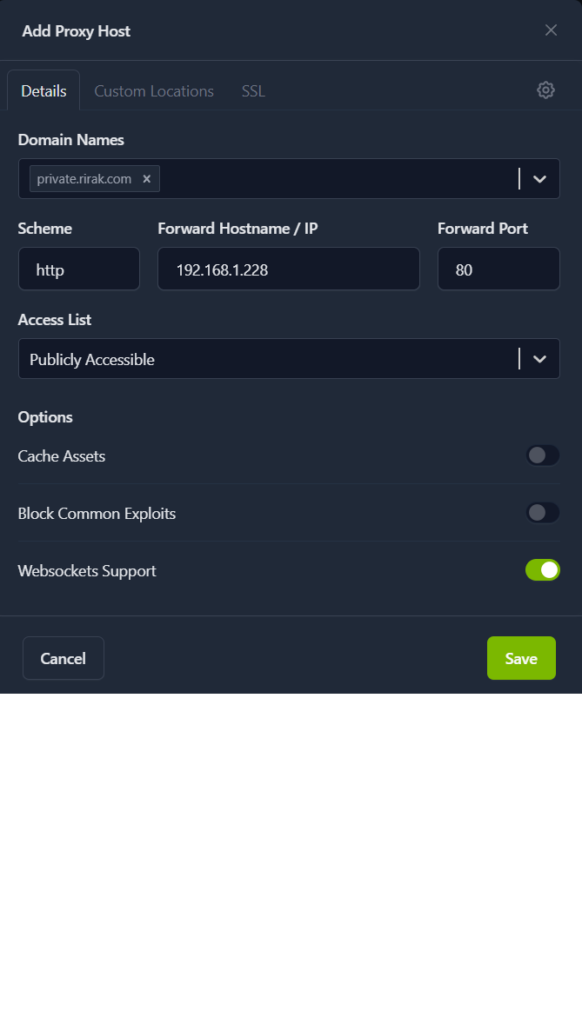
Next it was time to jump to Nginx Proxy Manager. I clicked “Add Proxy Host” and filled out the form.
- Domain Name:
private.rirak.com - Scheme:
http - Forward Hostname / IP: Headscale container IP
- Forward Port:
80 - Websocket Support: Enabled
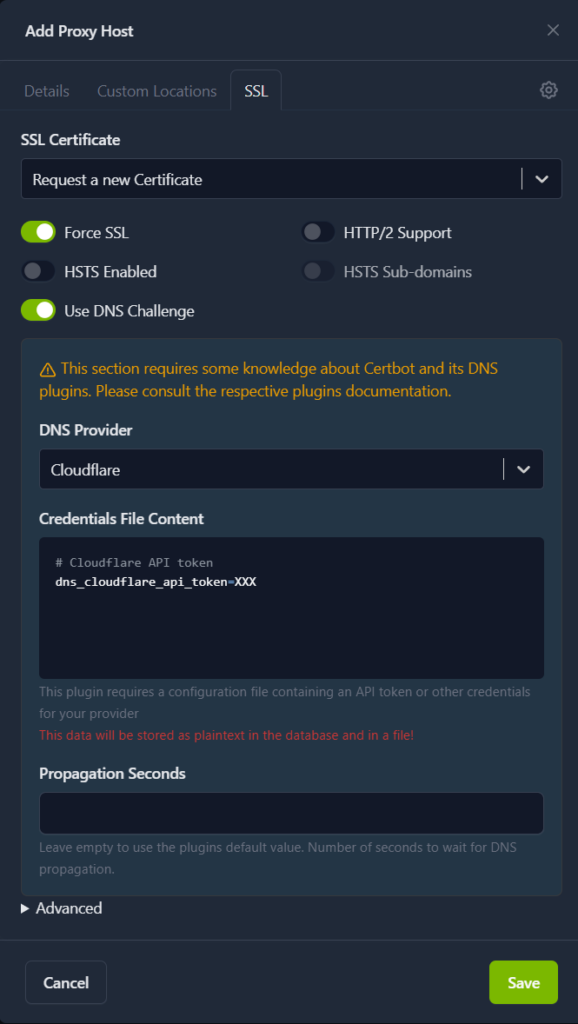
Then under the SSL Tab
- SSL Certificate: Request New Certificate
- Force SSL: Enabled
- Use DNS Challenge: Enabled
- DNS Provider: Cloudflare
- Credentials File Content:
dns_cloudflare_api_token=XXX
After saving, NPM generated the certificate and the UI showed that the certificate was active.
Switching to HTTP Challenge
Once the certificate existed, I deleted the proxy entry and recreated it — this time without the DNS challenge. Now it can renew via the HTTP challenge.
I also deleted the old certificate under the certificates tab and went back to Cloudflare to remove the API token.

With that configured, I rebooted Headscale to make sure it would work with the new configuration. Headscale produces a windows help page for configuring connections so this is a good way to check its running successfully. I tried to visit https://private.rirak.com/windows and the help page came up confirming the configuration was working correctly.
Setting Up the Headscale Admin UI
With Headscale configured, I wanted to try out the Admin UI. The admin UI is available at:
http://<LXC-IP>/admin/Accessing it through the external domain returned a 403 (likely intentional), but the internal IP worked fine. To get the UI authenticated, I needed to create an API key. So back in the Headscale node shell I ran
headscale apikey createThis returned an api key which I copied and saved for use in the UI. The UI opened up to a settings page which asked for the api key. Optionally I could overwrite the api url but it was already set to the correct IP.
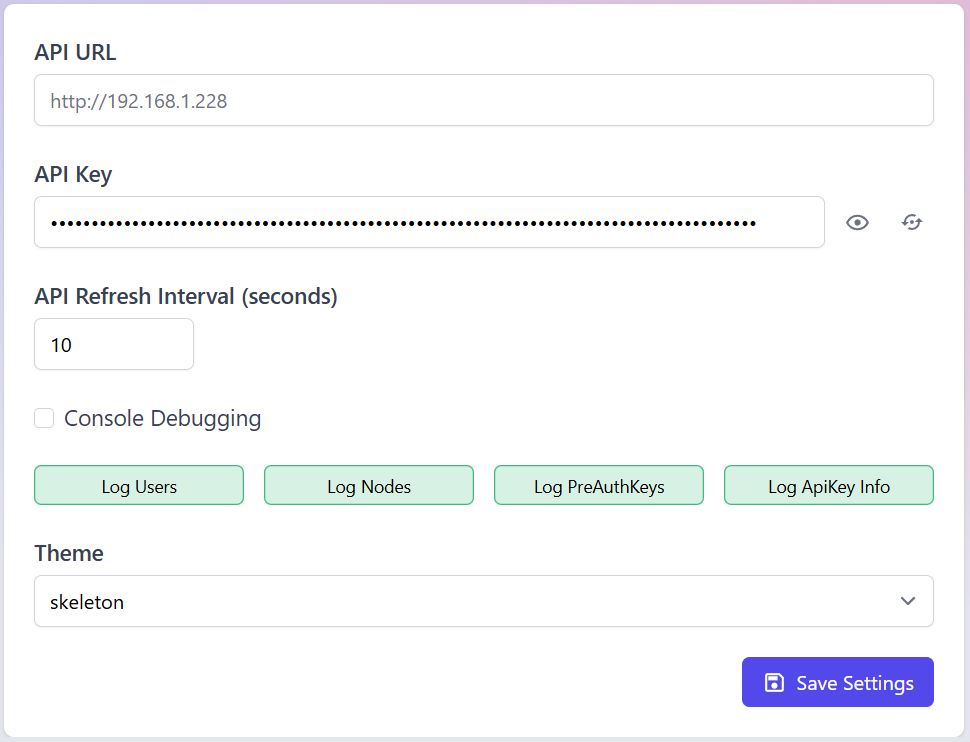
I saved the settings and then refreshed the page. The full sidebar now populated confirming that the authentication worked.
Creating a User
Next I needed to set up a user for myself, so that I could move on to configuring devices. There are two ways to do this.
- Via UI
- Navigate to the “Users” tab
- Click create
- Enter Name
- Click the checkmark to create
- Via CLI
headscale users create alex
Device Setup (Android)
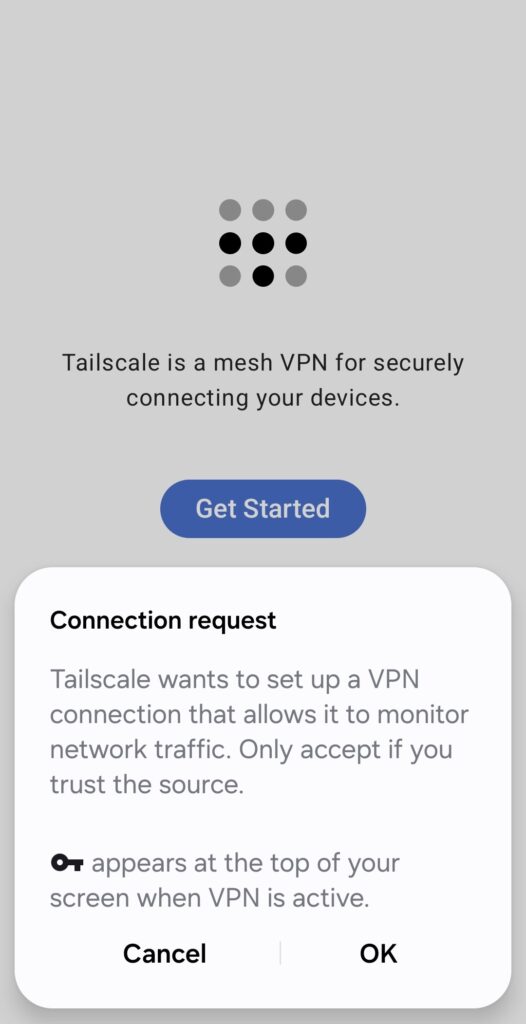
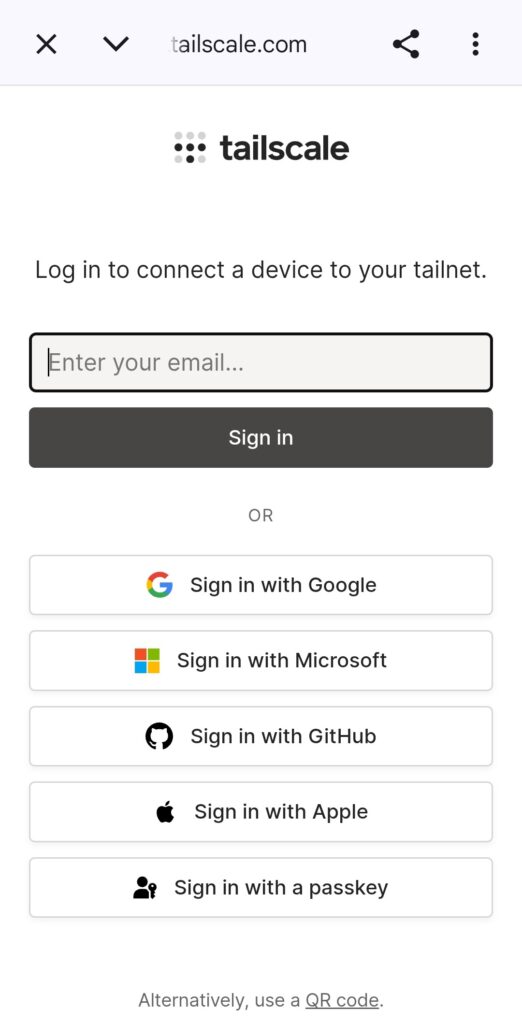
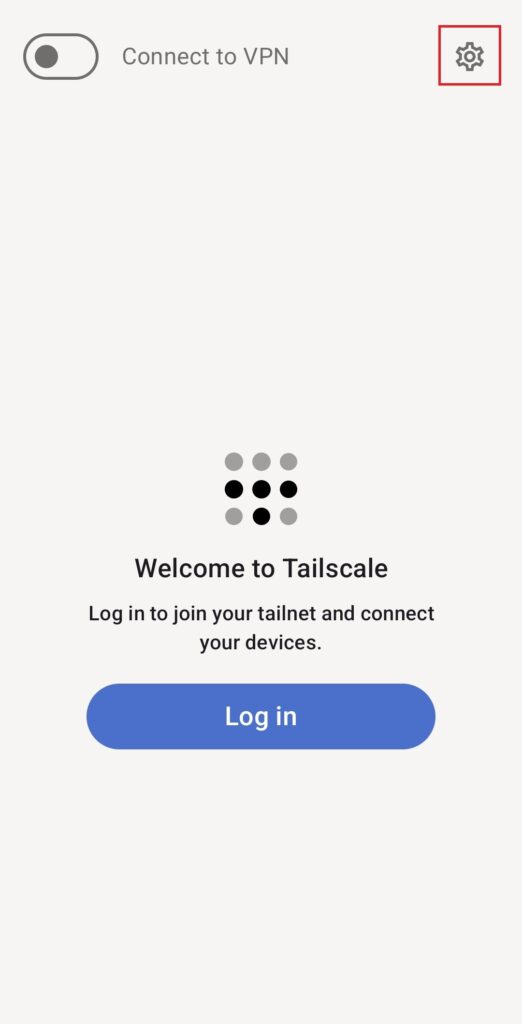
With the server ready, it was time to connect my first device. First, I downloaded the Tailscale app from the App store. When you first open the app up, it requests permissions to set up a VPN connection, I accepted. Next I was brought to a login screen, but I want to use my own control server rather than the normal Tailscale control server, so I exited out of the login page. I then tapped the cog in the top right corner to enter the settings page.
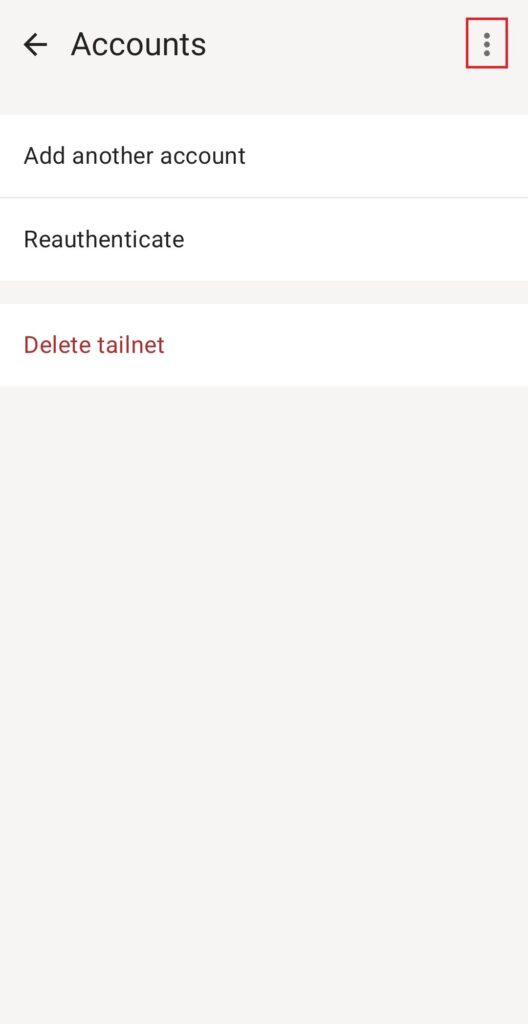
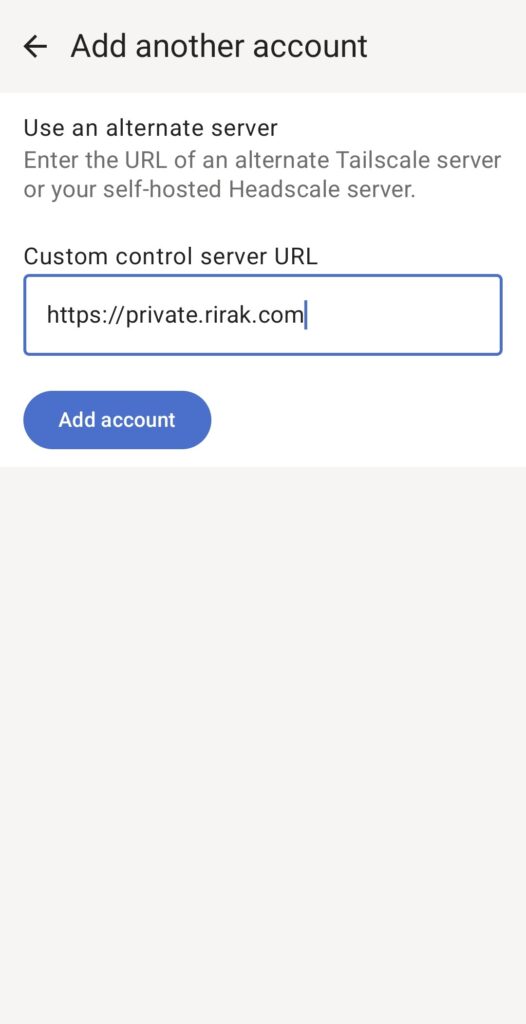
Then I selected “Accounts”, clicked the 3 dots in the top right corner, and selected “Use an alternate server”

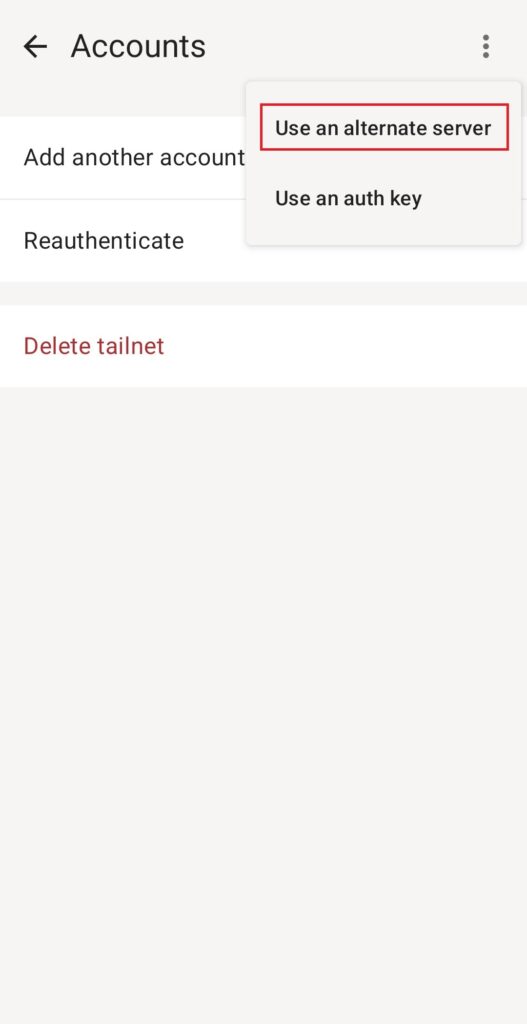
On the screen which came up, I entered the URL of my Headscale server. Upon clicking “Add Account” I was redirected to the “Machine Registration Page” which provided a registration command. This is where an Admin needs to register this device.
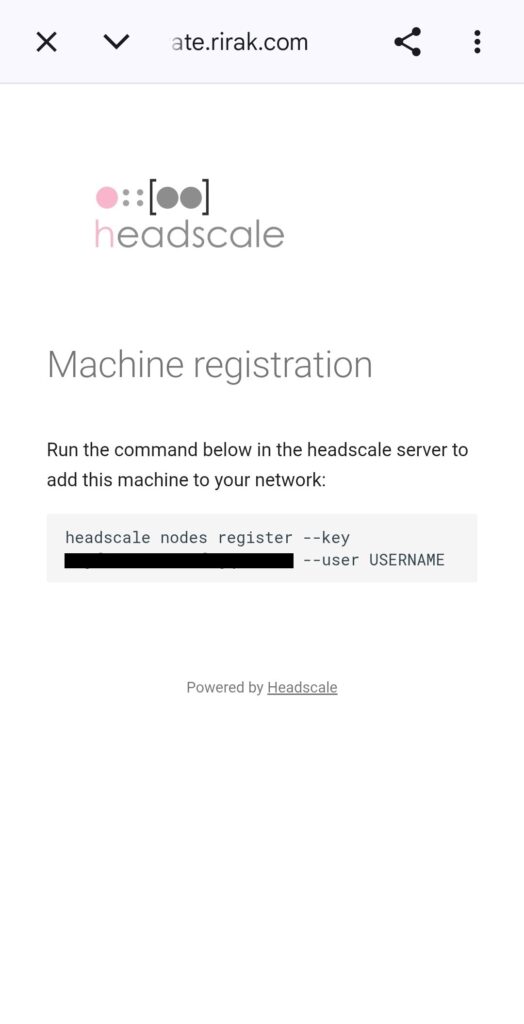
I took the registration command it gave me, and jumped over to the shell on the Tailscale node. I updated the user, and ran the registration command.
headscale nodes register --key <KEY> --user alex
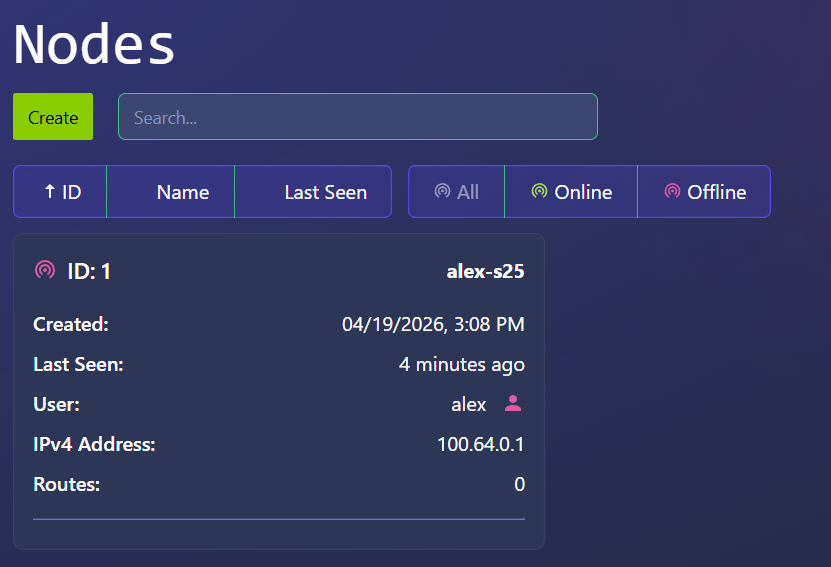
It auto assigned my device the random hostname of “invalid-dfborob5”. Apparently this is a common issue with Android devices on Tailscale. I decided to rename it. First I listed the devices, then I ran a rename command (where identifier is the id of the node).
headscale nodes list
headscale nodes rename alex-s25 --identifier 1
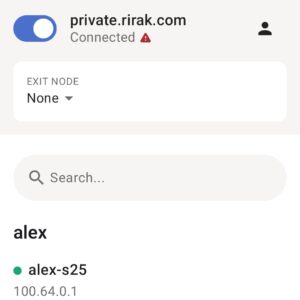
With that complete, I checked the Admin UI, and confirmed that I was able to see my new device node there.
Back on the phone, I was asked for notification permission, and then it showed the main screen confirming I was connected.
Device Setup (Debian & Exit Node)
With my phone connected to the VPN, the next step was setting up an exit node so the phone could route all its traffic through my home network. For this, I used a Debian LXC container running the Tailscale client. I chose an LXC container instead of a full VM because it’s lightweight and more than sufficient for running Tailscale. This part was more involved, since I had to configure the container itself before installing Tailscale.
Downloading the Debian Template
I decided to use Debian 12 because it’s well‑documented, stable, and works cleanly with Tailscale. Proxmox has an official template repository, so downloading it was easy:
- Under the root node, in the storage section, select “Local” and then in that window “CT Templates”
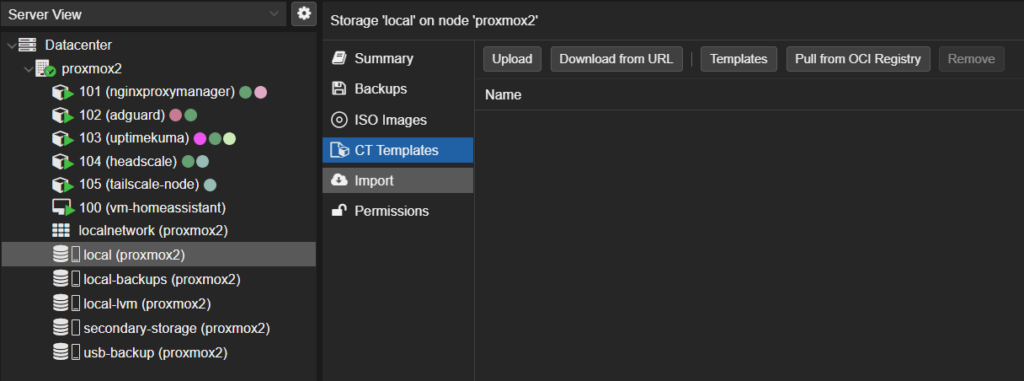
- Click “Templates”
- Search for “Debian 12”
- Select it and click “Download”

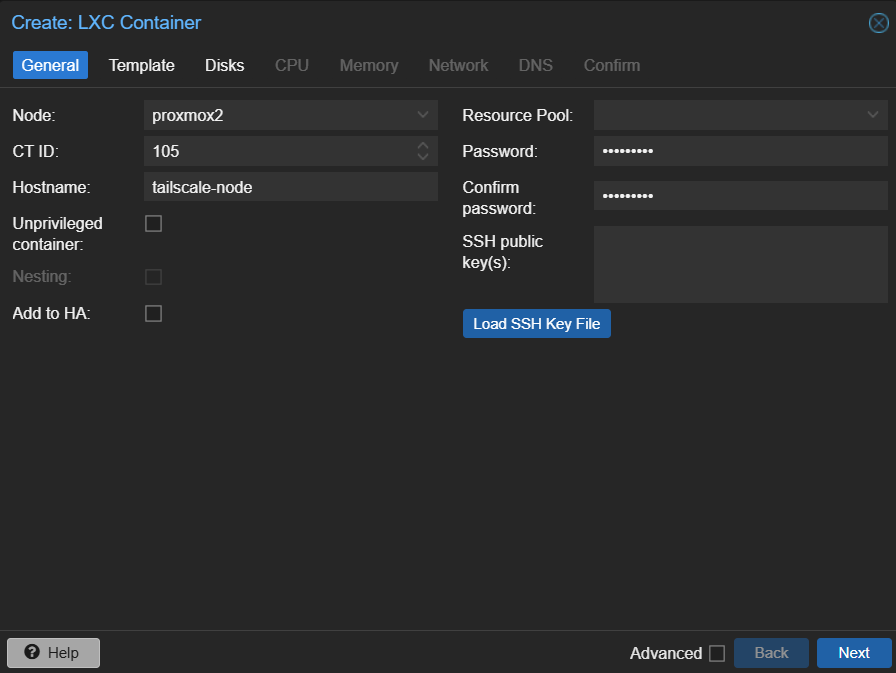
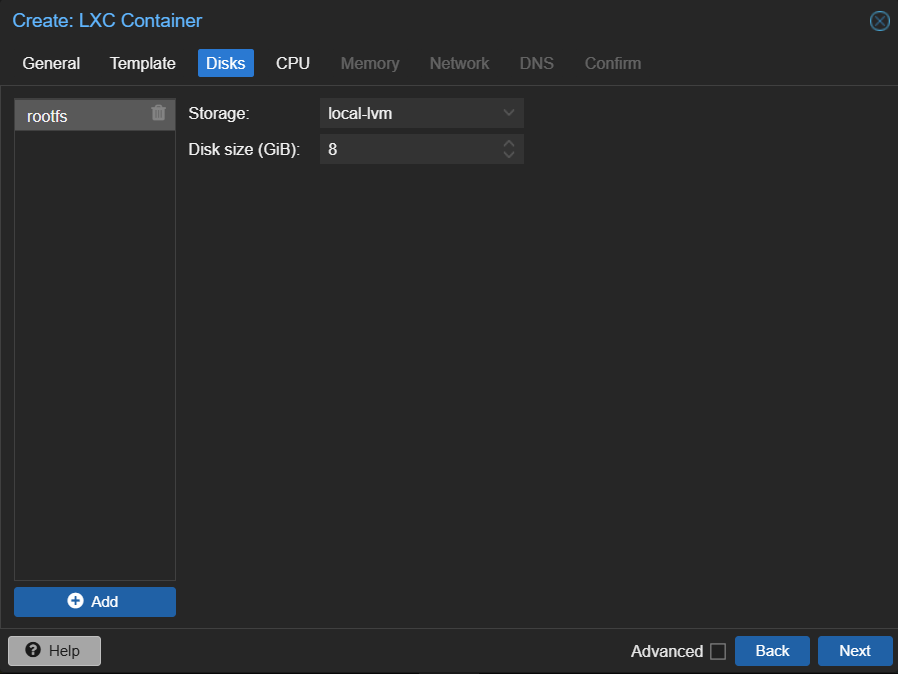
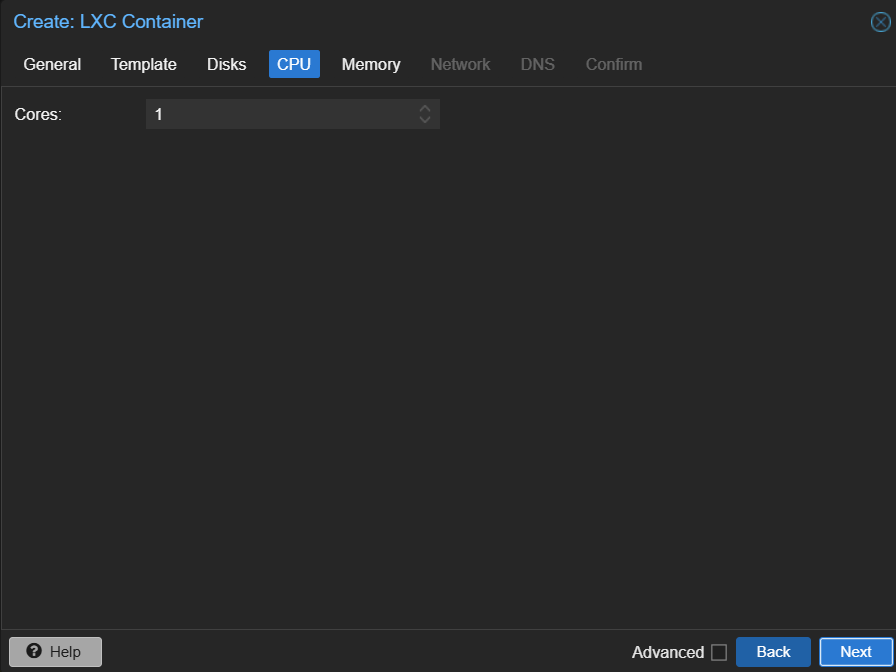
Creating the LXC Container
Next I created a new container using the Debian 12 template. I right clicked on my root node and selected “Create LC”. I then filled out the settings and chose to use the Debian 12 image I had downloaded.

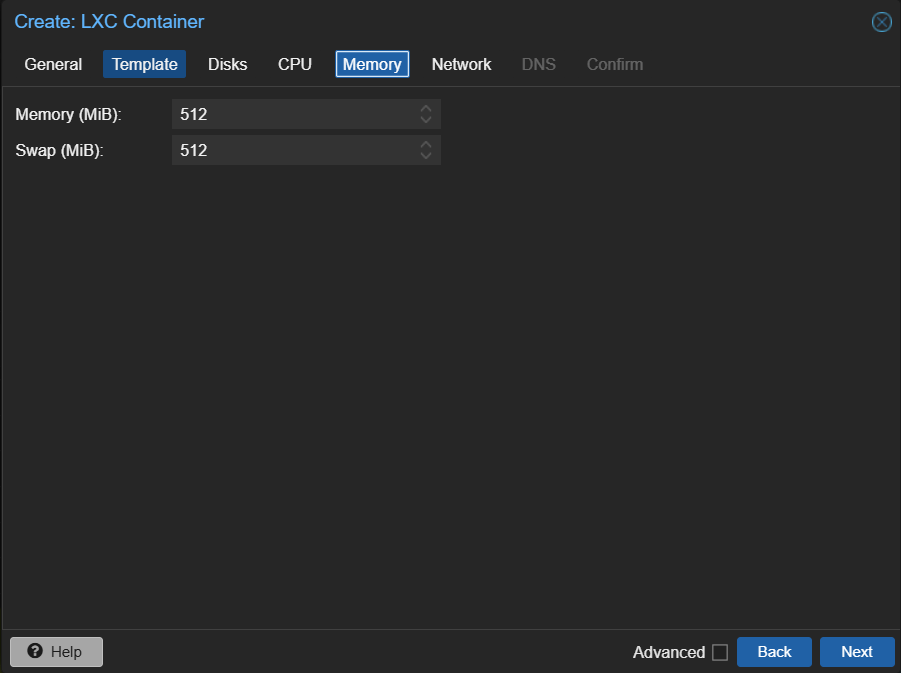
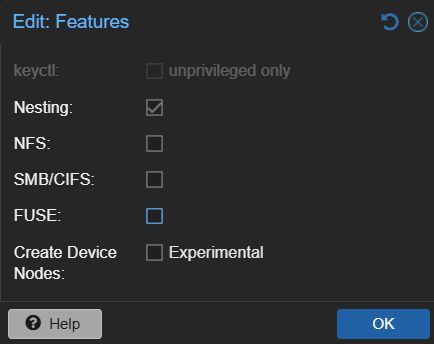
Once the container is created, select the container → options and double click features. Enable nesting, then click “ok”. This is required by systemd‑networkd and TUN.
Enabling Networking
When I first booted the container, it didn’t get an IP address. LXC containers sometimes need explicit network configuration. I opened a shell on the debian machine created a systemd‑networkd file
touch /etc/systemd/network/10-eth0.networkin that file I added the following content
[Match]
Name=eth0

[Network]
DHCP=yes
Save that file, then restart networking
systemctl restart systemd-networkdI also want to make sure this happens automatically on each boot, so I ran the following commands
systemctl enable systemd-networkd
systemctl enable systemd-networkd-wait-online
After a reboot, the container correctly received an IP.
Enabling TUN Support
Next I needed to set up TUN since Tailscale uses a TUN device to create its encrypted WireGuard tunnel. LXC containers don’t expose /dev/net/tun by default, so I had to enable it manually. I opened a shell on the root node and opened up the config
vim /etc/pve/lxc/105.confI added:
lxc.cgroup2.devices.allow: c 10:200 rwm
lxc.mount.entry: /dev/net/tun dev/net/tun none bind,create=file
lxc.apparmor.profile: unconfined
The AppArmor change is necessary because TUN access is blocked by the default profile. After restarting the container, I verified TUN was available:
ls -l /dev/net/tunInstalling Tailscale
With the container set up, it was time to install Tailscale. My container did not have curl installed so first I installed that and then Tailscale:
apt install curl
curl -fsSL https://tailscale.com/install.sh | sh
The install took a bit of time but finished successfully. Next I brought up the client:
tailscale up --login-server https://private.rirak.comThis produced a registration URL. I copied that URL from the shell, pasted it in my browser, and that brought me to the familiar “Device Registration” page with a node registration command. I opened a new tab, opened a shell to the headscale node and ran the registration command
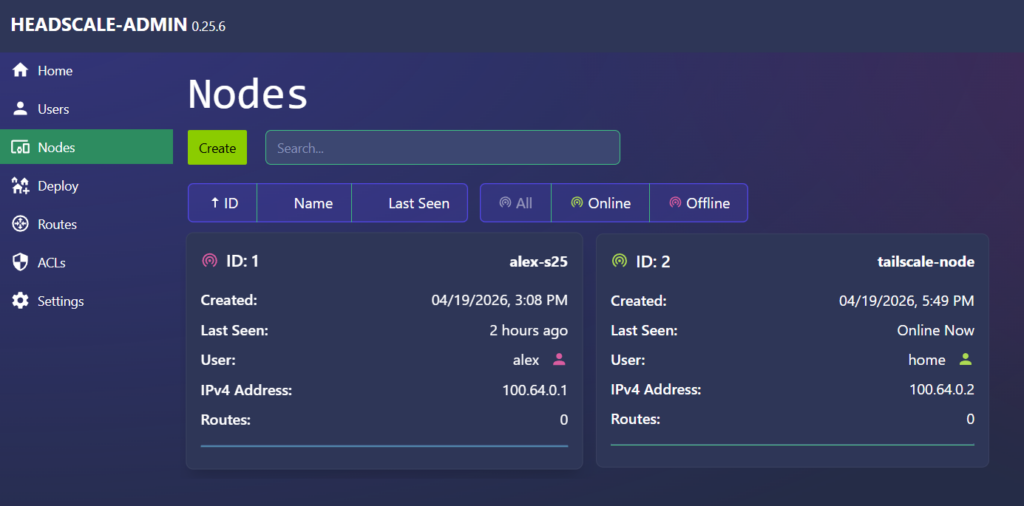
headscale nodes register --key <KEY> --user homeThe shell from the Debian machine, now displayed a success message. Jumping back to the admin UI, I could now see two nodes.
Configuring Exit Node
With the Debian container registered, I could now turn it into a fully functional exit node.
Advertising and Approving Routes
By default, Tailscale won’t route traffic through a node unless it explicitly advertises itself as an exit node. In the headscale shell, I can list the current routes to see that there are none available (headscale nodes list-routes).

Back in the Debian machine shell, I updated the client to advertise itself as an exit node. I disabled Tailscale DNS because I already use AdGuard on my home network and didn’t want Tailscale to override my DNS settings.
tailscale set --advertise-exit-node
tailscale set --accept-dns=false
Going back to the headscale shell and re-running the same list routes command, now returns the routes being advertised by the node but they are not approved yet. Tailscale requires admin approval for any advertised routes.

I can go ahead and approve the route (-i is the node id and -r is the specific route)
headscale nodes approve-routes -i 2 -r "0.0.0.0/0"Now if I list the routes again, they show up as approved

Now the node is recognized as an exit node.
Enabling IP Forwarding
Next we need to set up IP forwarding on the Debian machine. Without this, the node can advertise routes but won’t forward packets. In the Debian machine shell
echo "net.ipv4.ip_forward=1" >> /etc/sysctl.conf
echo "net.ipv6.conf.all.forwarding=1" >> /etc/sysctl.conf
sysctl -p
Enabling NAT
Finally, NAT is required so traffic from the VPN can reach the internet:
apt install iptables -y
iptables -t nat -A POSTROUTING -o tailscale0 -j MASQUERADE
iptables -A FORWARD -i tailscale0 -j ACCEPT
iptables -A FORWARD -o tailscale0 -j ACCEPT
and to make it persistent across restarts
apt install iptables-persistent -yThis ensures traffic from the VPN is translated correctly and survives reboots.
Testing the Exit Node
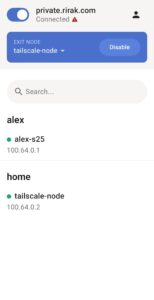
With all that setup complete, it was time to see if my phone would be able to use the exit node. I disconnected my phone from Wi‑Fi and checked my public IP. I then clicked the “Exit Node” banner in the Tailscale app and selected tailscale-node. Refreshing the IP check showed my home IP confirming everything worked.
Exposing Local Devices
The one last tweak I wanted to make to the setup is to allow access to my home router via the VPN. With my current setup, there is no way to access the router config from outside the house so this would make that possible.
On the Debian machine shell, I ran the following command to start exposing a route to the router.
tailscale set --advertise-routes=192.168.1.1/32Back in the Headscale shell, if I list routes again there is a new unapproved route. I approved it similar to before. We need to list the previous route too to keep it approved.
headscale nodes approve-routes -i 2 -r "0.0.0.0/0,192.168.1.1/32"
Now back on my android device, when connected to the VPN and using the exit node, I can go to 192.168.1.1 and I get to my router’s config page. One thing to note here, if the client is on a network that also uses 192.168.1.x, local routing will override the VPN route. But on a mobile or commercial network this should work fine.
Wrap Up
The setup was involved and took a few attempts to figure out but now I have a fully private, self‑hosted VPN mesh with a working exit node and remote access to key devices. Next, I’m considering adding Tailscale to more containers and experimenting with RustDesk over the VPN.